
If your dog just tore their ACL — or more accurately, their CCL — I know exactly where your head is right now. You’re scared, you’re Googling everything, and you’re probably staring at a surgery estimate that made your stomach drop. I’ve been there. My friend’s Golden Retriever, Duke, went through TPLO surgery two years ago, and I was right alongside her for every terrifying, frustrating, and ultimately rewarding week of recovery.
Here’s what I want you to know upfront: dogs recover from this surgery remarkably well. But — and this is a big but — the recovery period is where the real work happens. The surgery itself takes a couple of hours. The dog ACL surgery recovery takes months. And how seriously you take those months determines whether your dog gets back to chasing squirrels or develops a permanent limp.
This guide walks you through everything. The timeline, the home setup, the exercises, the warning signs. All of it based on what veterinary orthopedic surgeons recommend and what actually works in real life with a real dog who desperately wants to run and absolutely cannot.
Understanding CCL/ACL Surgery in Dogs
First, a quick anatomy lesson. Dogs don’t technically have an ACL. They have a CCL — cranial cruciate ligament — which does basically the same job as the human ACL. It stabilizes the knee joint and prevents the tibia from sliding forward. When it tears, your dog’s knee becomes unstable. They’ll limp, hold the leg up, and be in real pain.
CCL tears are the single most common orthopedic injury in dogs. It’s not even close. Large breeds get hit hardest — Labs, Goldens, Rottweilers, German Shepherds — but it happens across the board. And here’s the stat that’ll keep you up at night: 40-60% of dogs that tear one CCL will eventually tear the other one. Usually within a year or two. So everything you learn during this recovery? You might need it again.
TPLO vs TTA vs Lateral Suture — Quick Comparison
Your surgeon will recommend one of three main procedures. Here’s the honest breakdown:
| Procedure | Best For | Cost Range | Recovery Time | How It Works |
|---|---|---|---|---|
| TPLO | Dogs over 15 kg (33 lbs) | $3,500–$5,000 | 12–16 weeks | Cuts and rotates the tibial plateau to eliminate the need for the ligament |
| TTA | Medium to large dogs | $3,000–$4,500 | 10–14 weeks | Advances the tibial tuberosity to change joint mechanics |
| Lateral Suture | Small dogs under 15 kg | $1,500–$2,500 | 8–12 weeks | Places an artificial suture outside the joint to stabilize it |
TPLO is considered the gold standard for medium and large dogs. It has the best long-term outcomes and the lowest re-injury rates. If your surgeon recommends it and your dog is over 30 pounds, trust them on this one.
TTA gets similar results in many cases and some surgeons prefer it. Lateral suture works great for small dogs but tends to stretch out over time in larger, more active breeds. That’s why most orthopedic surgeons won’t recommend it for a 70-pound Lab.
Week-by-Week Recovery Timeline
This is the part you really need. I’m going to break down the dog TPLO recovery timeline week by week because knowing what’s coming makes the whole process less terrifying. These timeframes apply to TPLO and TTA — lateral suture recovery is usually a few weeks shorter.
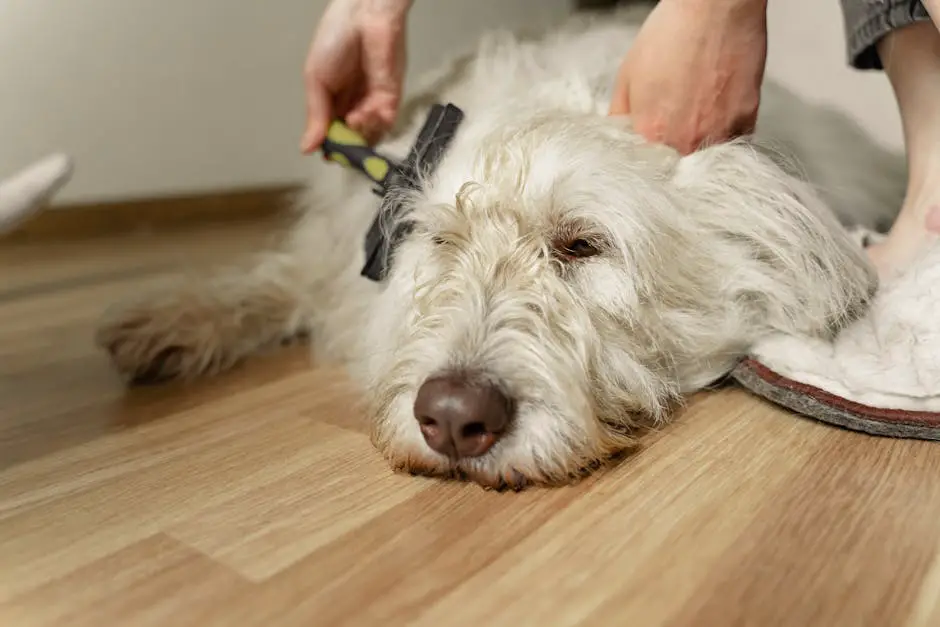
Weeks 1–2: Strict Crate Rest and Pain Management
This is the hardest stretch. Not for your dog — they’re drugged up and sleeping a lot. It’s hard for you.
What to expect: Your dog will come home groggy, with a shaved leg, a big incision, and possibly a drain. They’ll be on pain meds and anti-inflammatories. Most dogs won’t want to eat much the first day or two. That’s normal.
The rules:
– Crate rest or very small pen confinement. I mean it. No wandering the house.
– Leash walks ONLY to go potty. Straight out, do their business, straight back. Two to five minutes max.
– Use a sling or towel under their belly to support the back end when walking.
– Ice the knee for 10–15 minutes, three times daily, for the first 3–5 days.
– Check the incision twice a day for redness, swelling, or discharge.
– Keep the cone on. Yes, they hate it. No, you can’t take it off when you’re “watching them.” They’re faster than you think.
Duke tried to bolt after a cat on day four. Day. Four. With a plate and screws in his leg. Dogs have zero sense of self-preservation during recovery, so you have to be their brain.
Weeks 3–4: Controlled Leash Walks Begin
Around the two-week mark, you’ll have a recheck appointment. Assuming the incision looks good (and it usually does), your vet will clear you for slightly longer walks.
Activity level: Five to ten minute leash walks, two to three times per day. Slow pace. No grass that’s wet or uneven if you can avoid it. Flat, stable surfaces are your friend.
Your dog will start feeling better around this point and that’s actually dangerous. They’ll want to play, jump, roughhouse. Do not let them. The bone is still healing. The hardware is doing its job but it needs time.
Mental enrichment becomes essential here. Puzzle feeders, frozen Kongs stuffed with peanut butter, lick mats, snuffle mats — anything that makes their brain work without moving their body. I cannot overstate how important this is. A bored dog is a dog that’s going to do something stupid in their crate.
Weeks 5–8: Gradually Increasing Activity
Now we’re getting somewhere. Your vet will likely take X-rays around the six to eight week mark to check bone healing.
Activity level: Fifteen to twenty minute leash walks, two to three times daily. You can start walking on slightly varied terrain — gentle slopes, grass, dirt paths. Still on leash. Always on leash.
This is when physical therapy exercises really ramp up (more on those below). You might notice your dog starting to use the leg more consistently. Some dogs still toe-touch at this stage. Others are putting solid weight on it. Both are normal.
What you should see by week 8:
– Consistent weight-bearing on the surgical leg
– Decreased muscle atrophy (the leg won’t look as thin)
– Good range of motion in the knee
– No swelling around the joint
– Your dog actually wanting to walk rather than just tolerating it
If you’re not seeing these things, talk to your vet. Not every dog follows the textbook timeline and some need additional intervention.
Weeks 9–12: Return to Normal Movement
This is the home stretch — pun intended.
Activity level: Twenty to thirty minute walks. You can introduce gentle hills. Some vets will clear off-leash activity in a controlled, fenced area around week 10 to 12. Key word: controlled. Not the dog park. A boring fenced yard where there’s nothing exciting to chase.
Your dog’s confidence on the leg should be growing daily. They should be walking normally, sitting squarely (not kicking the leg out to the side), and starting to trot comfortably.
Most surgeons do a final X-ray and evaluation around week 12. If the bone has healed well and the leg is functioning properly, you’ll get the green light for a gradual return to full activity.
Months 4–6: Full Recovery and Strengthening
“Full activity” doesn’t mean you open the back door and let them sprint into the sunset. It means a gradual return over four to eight more weeks.
Start with longer walks — 30 to 45 minutes. Add light jogging on leash. Introduce fetch with short throws on flat ground. Swimming is phenomenal during this phase if your dog likes water. It builds muscle without stressing the joint.
By month six, most dogs are fully recovered. They’re running, playing, being dogs again. The leg might always be slightly less muscular than the other one. That’s fine. What matters is function.
Keep in mind the weight factor. Every extra pound puts additional stress on those healing joints. If your dog gained weight during the sedentary recovery months — and many do — now is the time to get it off. Lean dogs recover better and are less likely to blow the other knee.
Setting Up Your Home for Recovery
Don’t wait until you bring your dog home from surgery to figure this out. Prep your house before the procedure. You’ll thank yourself.
Non-Slip Flooring Solutions
Hardwood and tile floors are the enemy. A dog with a wobbly back leg on a slippery floor is a recipe for a setback — or worse, re-injury.
Options that work:
– Yoga mats cut to size and placed in high-traffic areas
– Rubber-backed bathroom rugs along their walking path
– Adhesive carpet runners from the crate to the door
– Dog socks or boots with grip pads (some dogs tolerate these, some don’t)
Cover every surface your dog will walk on. Kitchen, hallway, wherever. I’ve seen people duct-tape yoga mats to their floor for three months. It’s ugly. It works.
Crate or Pen Setup for Confinement
Your dog needs a space that’s big enough to lie down, turn around, and stand up — but not big enough to pace, play, or get zoomies. For most medium to large dogs, this means an exercise pen or a large crate.
Set it up with:
– Thick, supportive bedding (orthopedic foam, not a flat blanket)
– Water bowl that won’t tip
– A chew toy or two
– A clear line of sight to wherever you spend most of your time — isolation makes confinement so much worse
Some people use a small room (bathroom, laundry room) with a baby gate instead of a crate. That can work if the floor is non-slip and there’s truly nothing to jump on.
Ramps and Blocking Stairs
No stairs. Period. For at least eight weeks, ideally twelve. Block them with baby gates.
If your dog needs to get in and out of a car for vet visits, get a ramp. Don’t lift a 60-pound dog with a healing knee — that’s bad for their leg and your back. Pet ramps run $40 to $80 and they’re worth every cent. You’ll use them again as your dog ages.
Same goes for getting on and off beds or couches. But honestly? During recovery, your dog shouldn’t be on furniture at all. I know that’s hard to hear if your dog sleeps in your bed. Move your mattress to the floor or sleep next to their crate for the first couple weeks. I’m not kidding. People do this. Good dog owners do this.
Managing Pain and Medications
Pain management after CCL surgery recovery in dogs isn’t optional — it’s fundamental to healing. A dog in pain won’t use the leg. A dog that doesn’t use the leg loses muscle. Lost muscle means a worse outcome.
Prescribed Pain Medications (NSAIDs, Gabapentin)
Your vet will typically send your dog home with a combination of:
- An NSAID (carprofen/Rimadyl, meloxicam, or similar) — reduces inflammation and pain. Give with food. Always.
- Gabapentin — handles nerve pain and provides mild sedation, which is honestly a bonus during crate rest.
- Tramadol (sometimes) — an additional pain reliever for the first few days.
Give every dose on schedule. Don’t skip doses because your dog “seems fine.” They’re fine because of the meds.
Never give human NSAIDs. No ibuprofen, no aspirin, no naproxen. These can cause kidney failure, gastric ulcers, or death in dogs. If you run out of prescribed medication, call your vet — don’t raid your medicine cabinet.
Watch for side effects: vomiting, diarrhea, dark or tarry stool, loss of appetite. Report these immediately.
Icing the Surgical Site
Ice reduces swelling and provides pain relief, especially in the first week.
How to ice properly:
– Wrap a cold pack or bag of frozen peas in a thin towel
– Apply to the outside of the knee for 10 to 15 minutes
– Three to four times per day for the first five to seven days
– Never put ice directly on skin or the incision
Most dogs actually enjoy this. The cold feels good on the swollen joint. If your dog won’t tolerate it, don’t force it — stress isn’t helping anyone.
Physical Therapy Exercises You Can Do at Home
Physical therapy makes a measurable difference in dog knee surgery aftercare outcomes. Studies show dogs that receive structured rehab have better limb use, more muscle mass, and a faster return to function than dogs that just rest.
You don’t need a canine rehab facility (though they’re great if you have one nearby). Many exercises can be done at home.
Passive Range of Motion Exercises
Start these as early as day two or three post-surgery, unless your vet says otherwise.
With your dog lying on their side (surgical leg up), gently support the knee and slowly flex and extend the joint. Think of it like slowly bending and straightening their leg. Go slowly. Stop if your dog tenses or cries. You’re not stretching — you’re just maintaining range of motion so scar tissue doesn’t lock things up.
Do 10 to 15 repetitions, two to three times per day. It takes about two minutes. Your dog might not love it at first, but most get used to it quickly, especially if you pair it with treats.
Sit-to-Stand Exercises
Start these around week three to four, after your vet gives the okay.
This is exactly what it sounds like. Ask your dog to sit, then stand, then sit again. The motion of sitting and standing forces them to use the surgical leg and builds muscle in the quads and hamstrings.
The key: Make sure they’re sitting squarely — both back legs tucked under, not kicked off to one side. Dogs will cheat and avoid loading the sore leg. If they’re sitting crooked, gently guide them into a proper sit.
Start with 5 repetitions, twice a day. Build to 10 to 15 reps as they get stronger. Use treats to motivate. Make it a game, not a chore.
Underwater Treadmill (If Available)
If you have access to a canine rehab center with an underwater treadmill, this is the single best thing you can do for your dog’s recovery.
The water supports their body weight while the treadmill forces them to use all four legs evenly. It builds muscle fast, improves range of motion, and most dogs genuinely enjoy it. Sessions usually run $40 to $80 each, and your vet might recommend one to two sessions per week starting around week four to six.
Not everyone can afford this or has one nearby. That’s okay. Home exercises still produce good results. But if it’s an option, take it.
Swimming in a calm body of water is a decent alternative starting around week eight to ten. No lakes with steep banks or strong currents. A pool with a ramp is ideal. Support your dog with a life vest and stay with them.
Warning Signs of Complications
Most dogs recover from CCL surgery without major issues. But complications happen, and catching them early is everything.
Call your vet immediately if you see:
– Excessive swelling around the incision or knee that’s getting worse, not better
– Discharge from the incision — especially anything green, yellow, or foul-smelling
– Fever (rectal temperature over 103°F / 39.4°C)
– Refusal to eat for more than 24 hours post-surgery
– Sudden worsening of the limp after initial improvement
– The incision opening up or looking like it’s pulling apart
– Vomiting or diarrhea that lasts more than a day (could be a medication reaction)
Less urgent but still worth a call:
– Your dog isn’t putting any weight on the leg by week three to four
– Persistent swelling that doesn’t respond to icing
– Limping that seems to get worse with activity rather than better
– Your dog licking obsessively at the incision despite the cone
One thing that scared me when Duke was recovering — around week three, he had a day where he was suddenly much more lame. I panicked. Turns out, he’d been feeling good, overdid it slightly during a potty break, and irritated the joint. The vet said it was normal. Minor setbacks happen. The pattern should be generally improving over time, not perfection every single day.
Frequently Asked Questions
How long does it take for a dog to fully recover from ACL surgery?
Most dogs reach full recovery between four and six months after surgery. The bone typically heals by 8 to 12 weeks, but full muscle recovery and return to normal activity takes longer. Large breeds and older dogs may trend toward the longer end. By six months, the vast majority of dogs are back to their normal activity level.
Can my dog ever run again after TPLO surgery?
Yes. That’s the whole point. TPLO surgery has excellent outcomes, with most studies showing 90-95% of dogs return to normal or near-normal function. Your dog should be able to run, jump, play, and do everything they did before — once they’re fully healed. Rushing the recovery is what causes problems.
How do I stop my dog from jumping on the couch during recovery?
Block access. Baby gates, exercise pens, keeping them leashed to you at all times when outside the crate. Don’t rely on verbal commands — a dog feeling good on pain meds will ignore “off” in a heartbeat. Management beats training during recovery. Remove the opportunity entirely.
Is it normal for my dog to not use the leg at all after surgery?
For the first few days, yes. Most dogs will toe-touch or hold the leg up for the first 48 to 72 hours. By the end of week one, you should see some toe-touching. By week two to three, they should be starting to put real weight on it. If your dog isn’t using the leg at all by week three, schedule a recheck. Something might need attention.
How much does dog ACL surgery recovery cost in total?
Beyond the surgery itself ($1,500 to $5,000 depending on procedure), budget for: pain medications ($50–$150), follow-up X-rays and vet visits ($200–$400), a crate or pen if you don’t have one ($50–$150), non-slip rugs and ramps ($50–$100), and optional physical therapy ($400–$1,000 for a course of sessions). All in, expect to spend $2,500 to $7,000 total. Pet insurance that covers orthopedic conditions is worth looking into before you need it.
Should I get surgery for my dog’s torn ACL, or can it heal on its own?
A completely torn CCL will not heal on its own. The joint will remain unstable, arthritis will develop rapidly, and your dog will be in chronic pain. For dogs over 15 to 20 pounds, surgery is strongly recommended. Very small dogs can sometimes manage with conservative treatment (rest, bracing, physical therapy), but even then, outcomes are typically better with surgery. Don’t wait and hope — instability causes more damage over time.
The weeks after CCL surgery are honestly some of the most demanding you’ll face as a dog owner. You’re managing medications, restricting a dog that just wants to be a dog, doing exercises that feel like they’re not making a difference (they are), and spending money you probably weren’t planning to spend.
But it works. The surgery works and the recovery process works — if you commit to it. Stay strict with the crate rest early on. Do the physical therapy. Keep your dog lean. And be patient with the bad days, because they’ll have them.
Three months from now, you’re going to watch your dog trot across the yard like nothing ever happened. And all those weeks of crate rest and slow leash walks and frozen Kongs will have been completely worth it.
Featured Image Source: Pexels